A peek inside my playground

Yesterday after I mentioned that I like to play around with camera apps on my phone some of you asked which ones were my favorites and if I had any tips on how to use them. There are too many apps and ways to use them to include in one post, so I thought I’d start with the two apps I use to edit almost every photo I post to Instagram. The first thing I should point out is this: I rarely ever use the built-in filters in Instagram. Instead, I edit a photo with other programs and get it to look exactly like I want it to look before I ever import it. This may hurt Instagram’s feelings but I’m sure that it has a roster of therapists it can talk to about that.
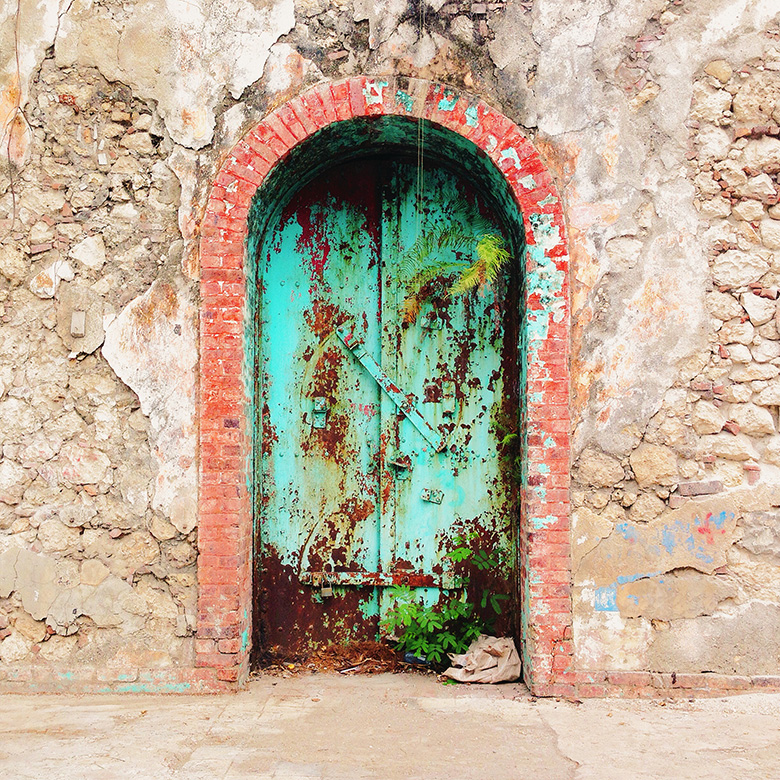
For purposes of this demo I’m going to use a photo I took in Jacmel, Haiti of a building across the street from my hotel:

The photo is fine as it is, but fine is not fun.
The first app I use is called Snapseed:
First I import the photo into the app.

Many times it’s a little slanted or the line of the horizon is a little off, so I’ll use the straighten tool to level the photo. This has been one of the hugest takeaways from following so many professional photographers. A picture looks so much better when it’s precisely aligned.

Next, I either use the DRAMA or the HDR SCAPE filter, and in this instance I chose HDR SCAPE.

As you can see it really intensifies the colors and shadows and highlights, everything all at once, so you have to be careful with this one. I always tone this filter down, otherwise it makes the whole thing look alien or clownish.

Then I save it to my camera roll.
Next I use VSCOcam:
VSCOcam comes with a set of filters but I splurged on a whole bunch of other presets which are now 50% off. Hit the little white box with line in the lower lefthand corner to see the store:

Once I’ve imported the photo, I go through the presets and decide what kind of mood I’m going for. The ones I use most are: M5, T1, C3, S4, and S6.

For this photo I chose S6.

Next I sharpen the photo which goes a long way in drawing out the details and contrasts in colors.

Next, I play around with the saturation a bit.

Then I slightly tweak the temperature.

Those are the three tools I use most: sharpening, saturation, and temperature. Often I will use the “shadows” tool when certain details are too dark or the “fade” tool if somewhere along the way I got a little too carried away.
Finished photo:

Here’s another example using a shot I took in one of the beautiful, newly planted courtyards at Hôpital de Mirebalais:

First an import into Snapseed.

Next, I tilted it to the left a bit.

This time I actually used the crop tool in Snapseed to focus in on the plant and my shoes.


Once again I used the HDR SCAPE filter and toned it down a bit:

Once I saved it to my photo album I imported it into VSCOcam and applied the S3 preset:

Some saturation and sharpening:


This time I feel like I might have taken it too far so I chose to fade the whole thing a bit:

Finished photo:

